Importing data with CSV
Import product, variant, and SKU data into Emfas from CSV files via the proposal workflow
Need to bring product data into Emfas from a spreadsheet? The CSV import wizard lets you upload data from any CSV file and map it to your product catalog. Every CSV import creates a proposal — a reviewable set of changes you can inspect, refine, and publish — so you never write directly to your catalog by accident.
File size limit
CSV files can be up to 300MB in size. If you have larger files, consider splitting them into smaller chunks.
Accessing CSV import
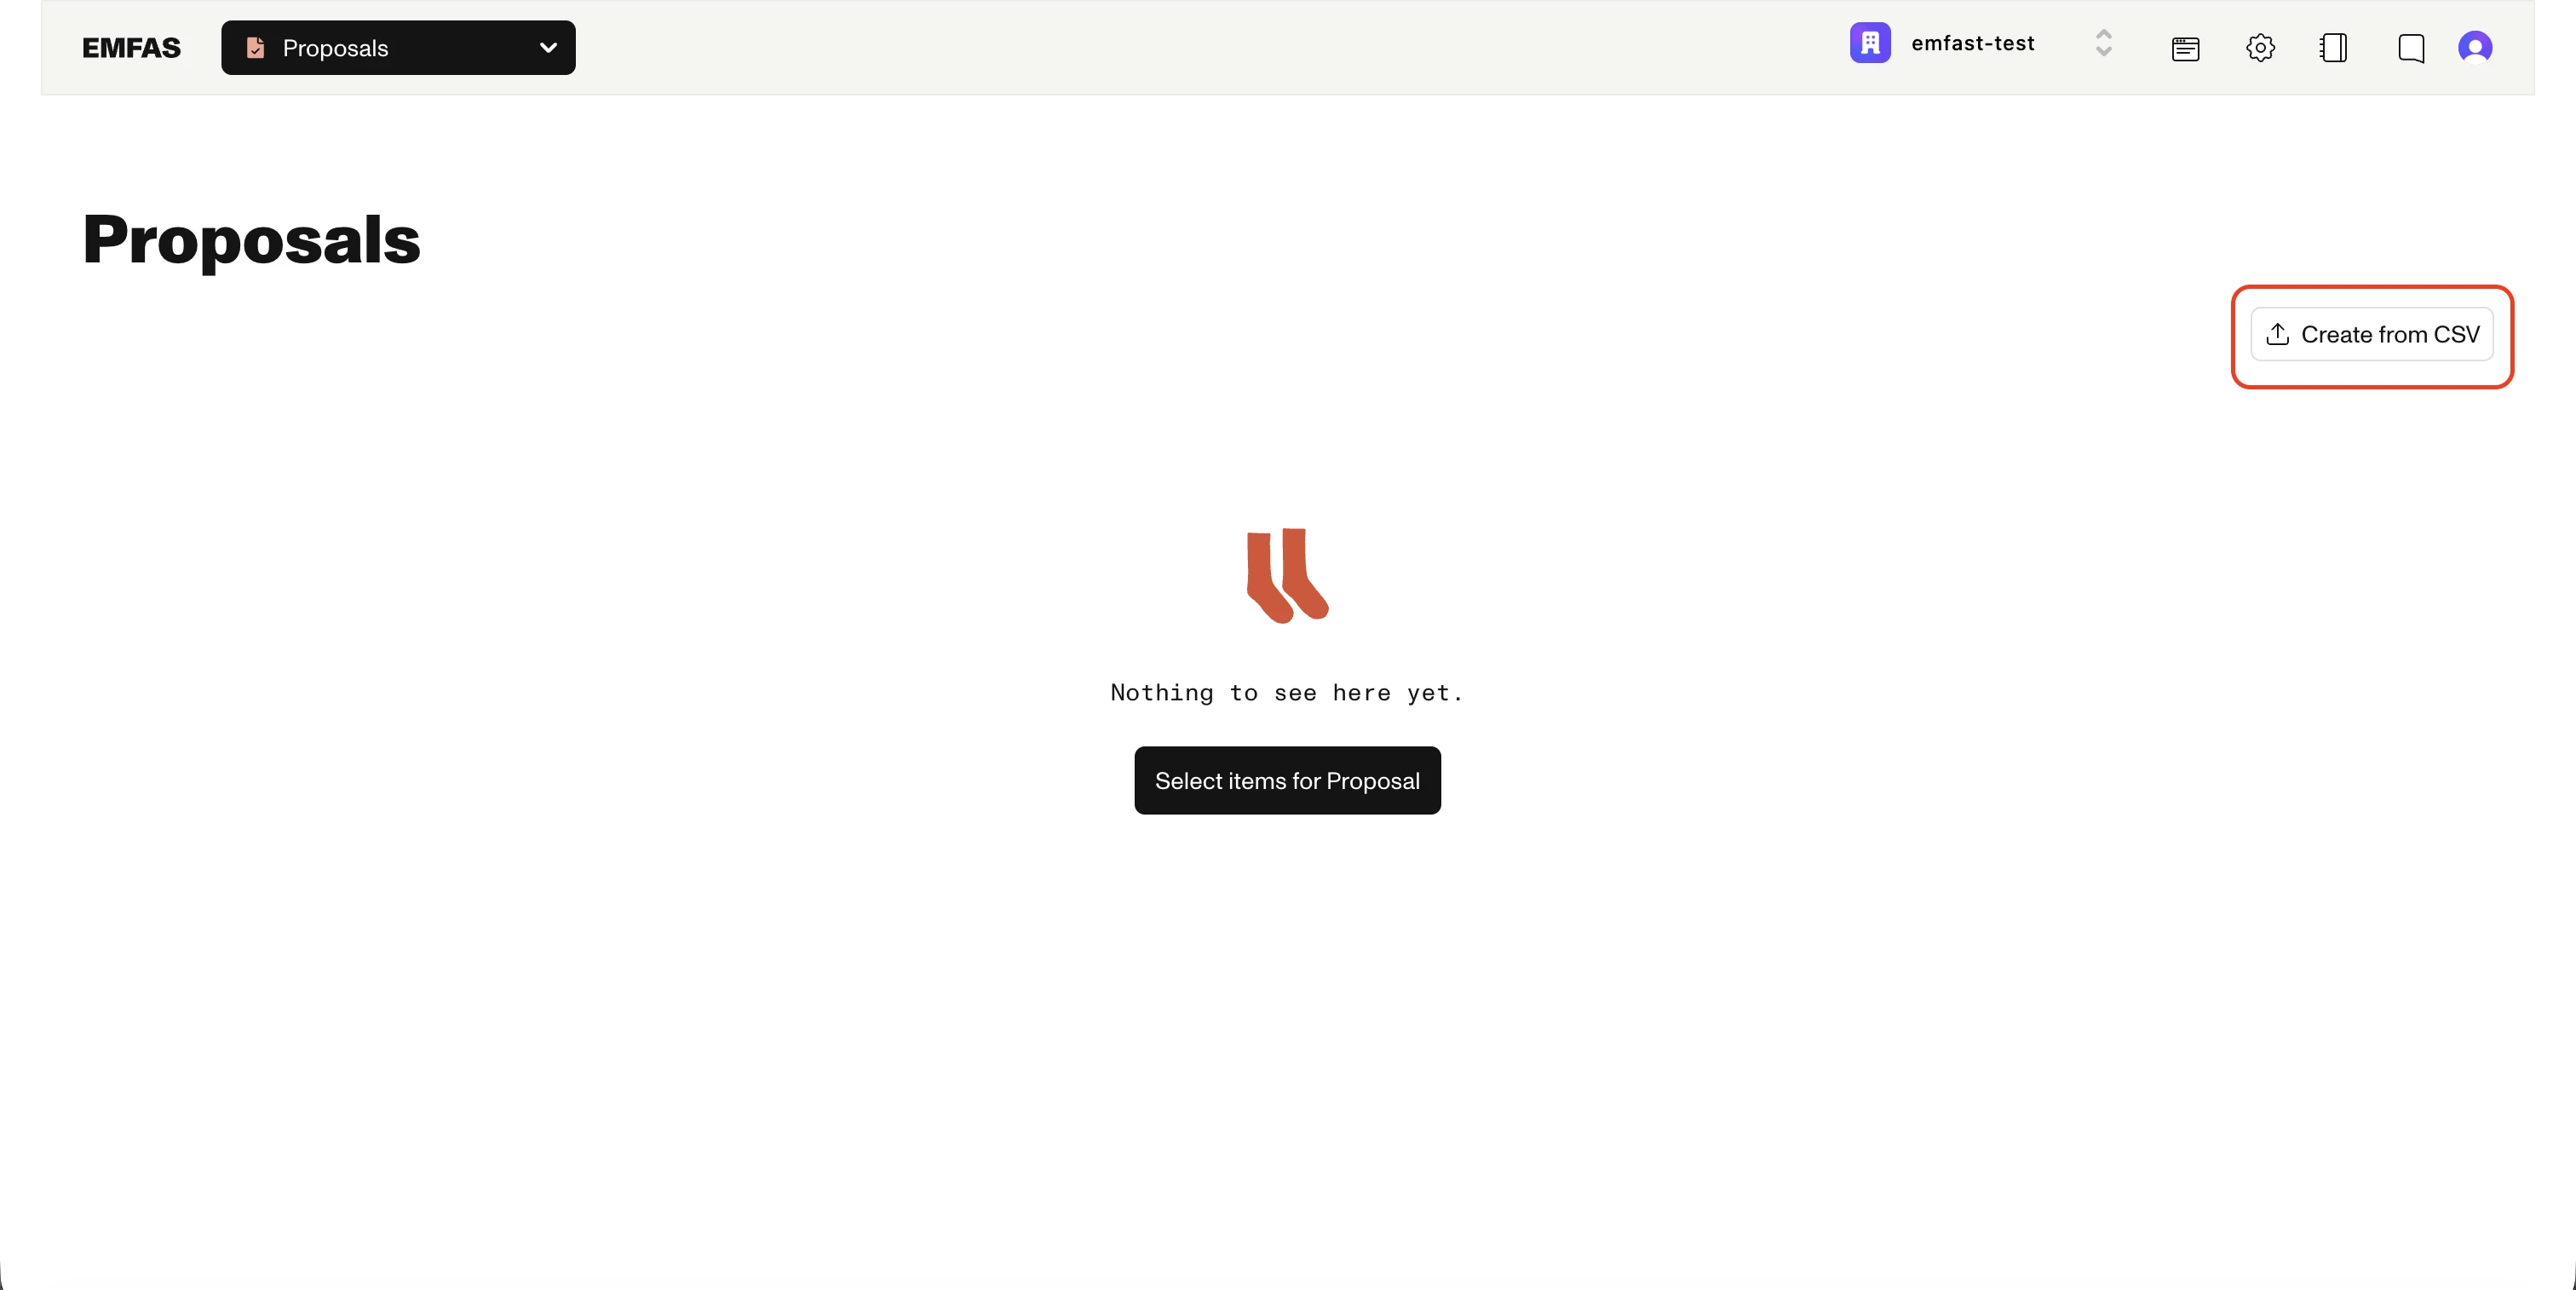
CSV import lives on the Proposals page:
- Open Proposals from the sidebar
- Click Create from CSV in the top right corner
- Pick your CSV file
Once the file is parsed you'll be taken into the two-step import wizard.
All imports go through proposals
There is no longer a separate "Import CSV" button in the product catalog or in settings. Every import flows through the proposal system so you can review what will change before it touches your live data.
The two-step wizard
The wizard guides you through two steps, shown as a progress bar at the top of the page:
| Step | Purpose |
|---|---|
| 1. Entity Matching | Tell Emfas which entity types your CSV represents (Products, Variants, SKUs) and which columns identify them |
| 2. Data Mapping | Map your remaining CSV columns to Emfas attributes |
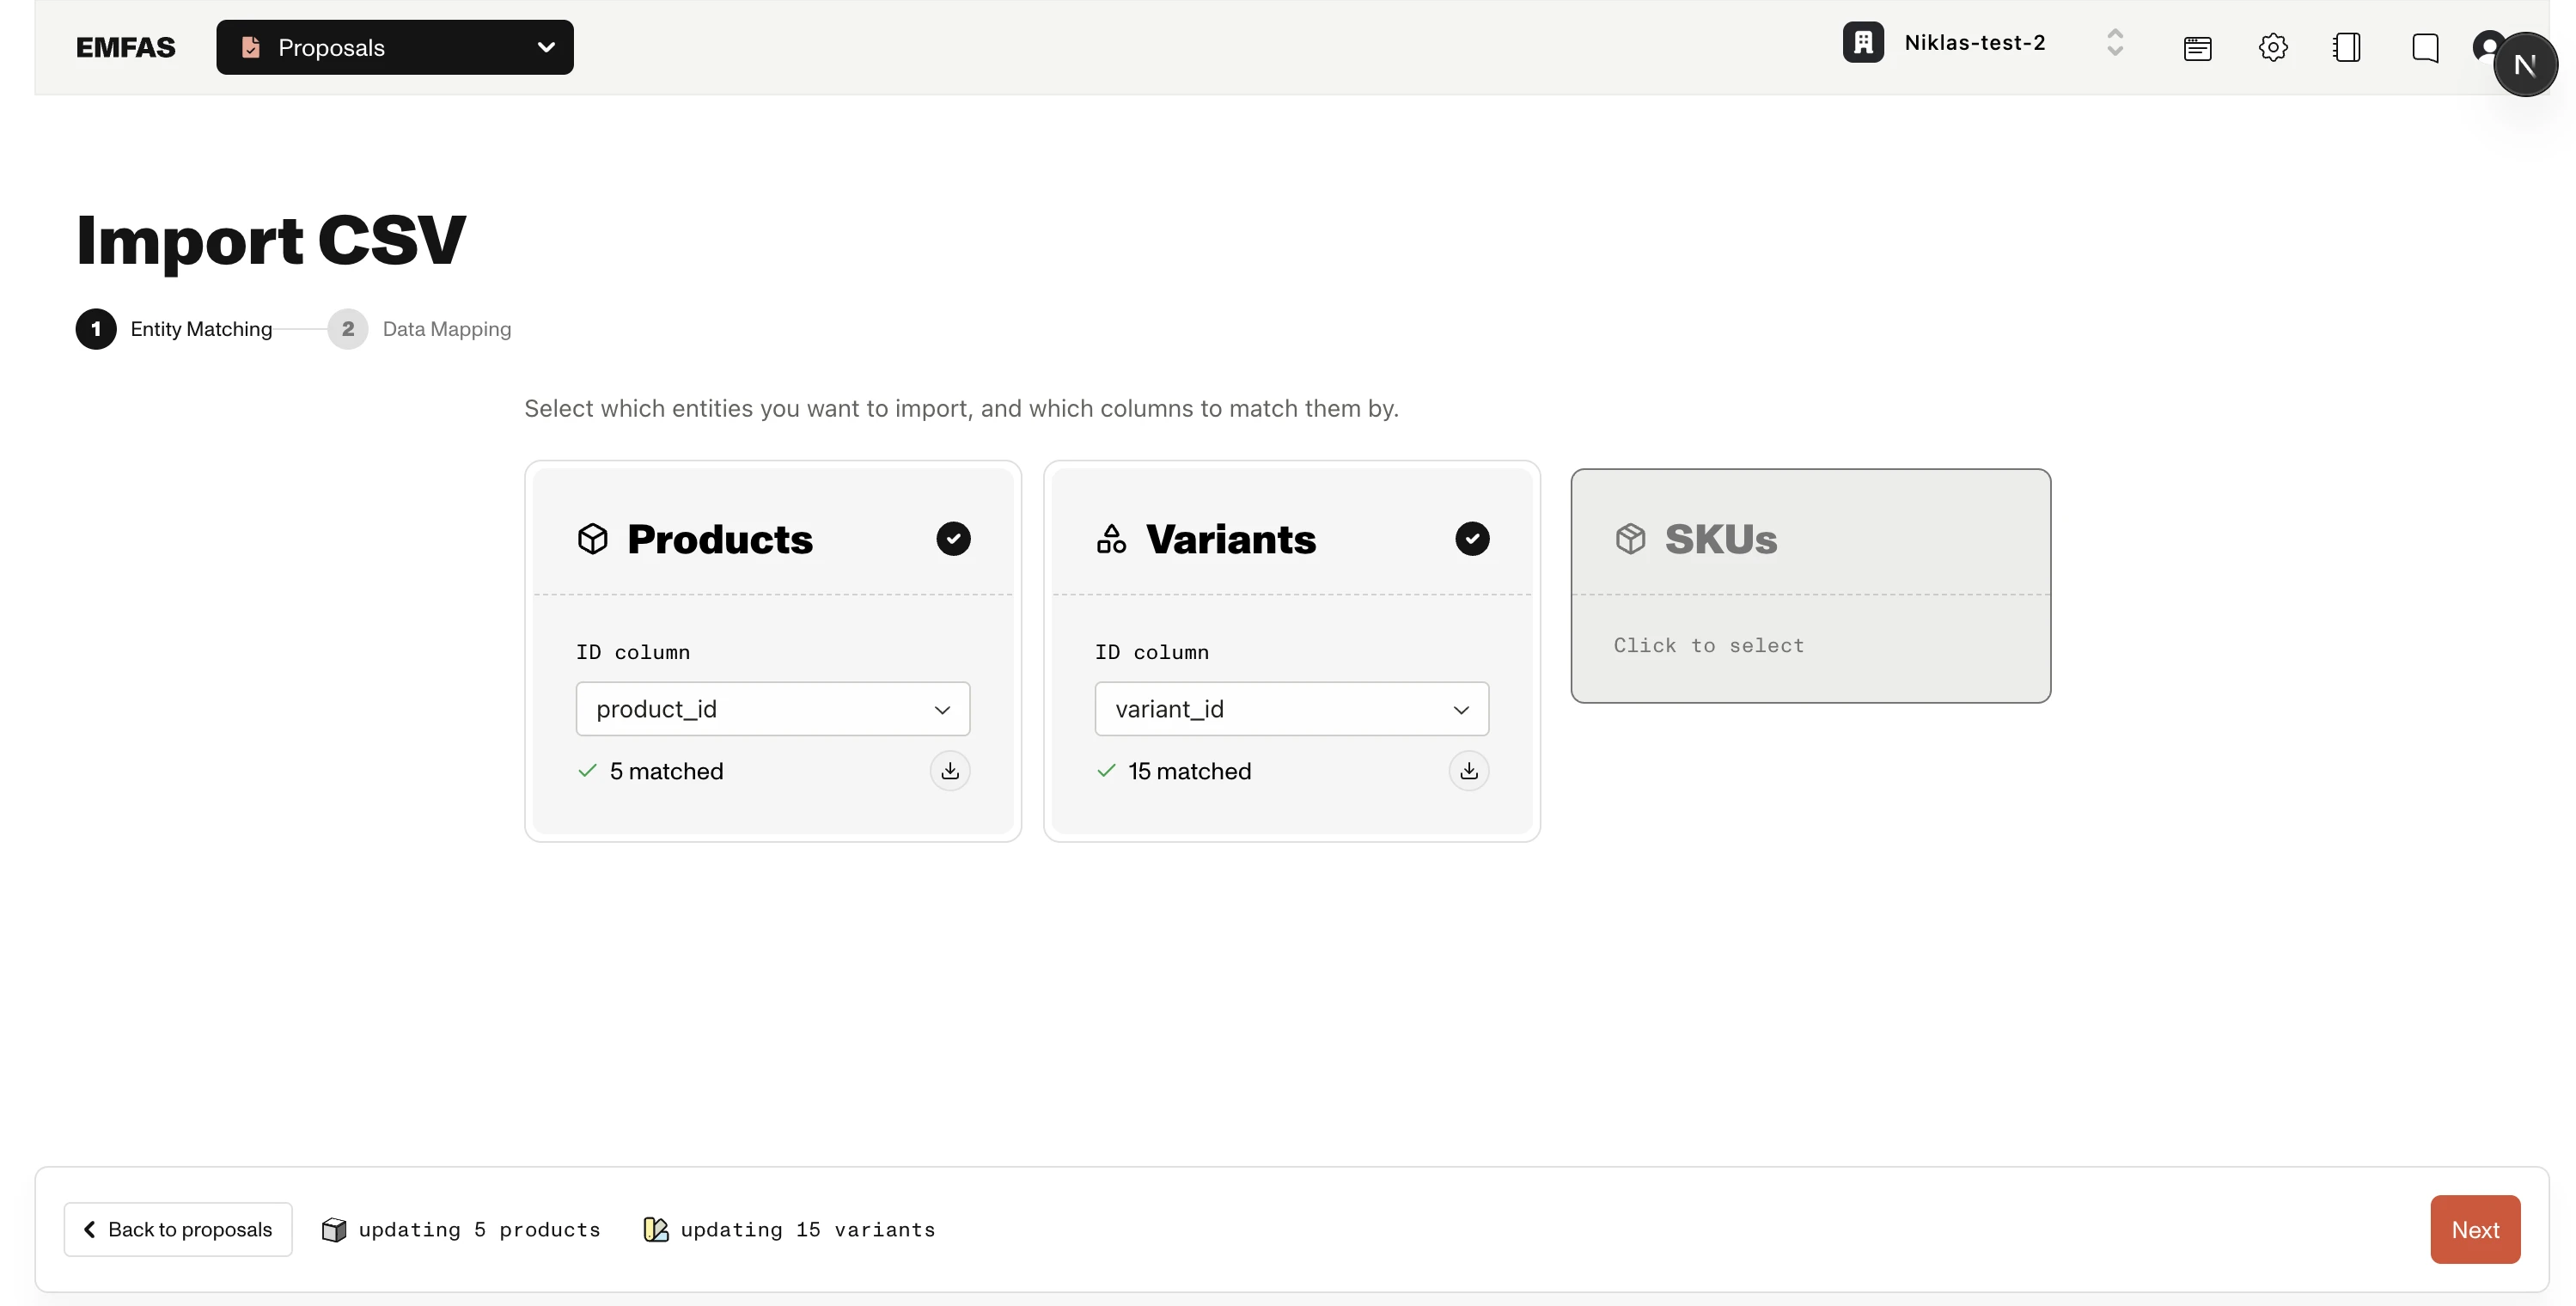
A live action bar at the bottom of the page shows what will happen as you make choices — for example "updating 142 products" or "creating 38 variants" — so you always know what the resulting proposal will contain.
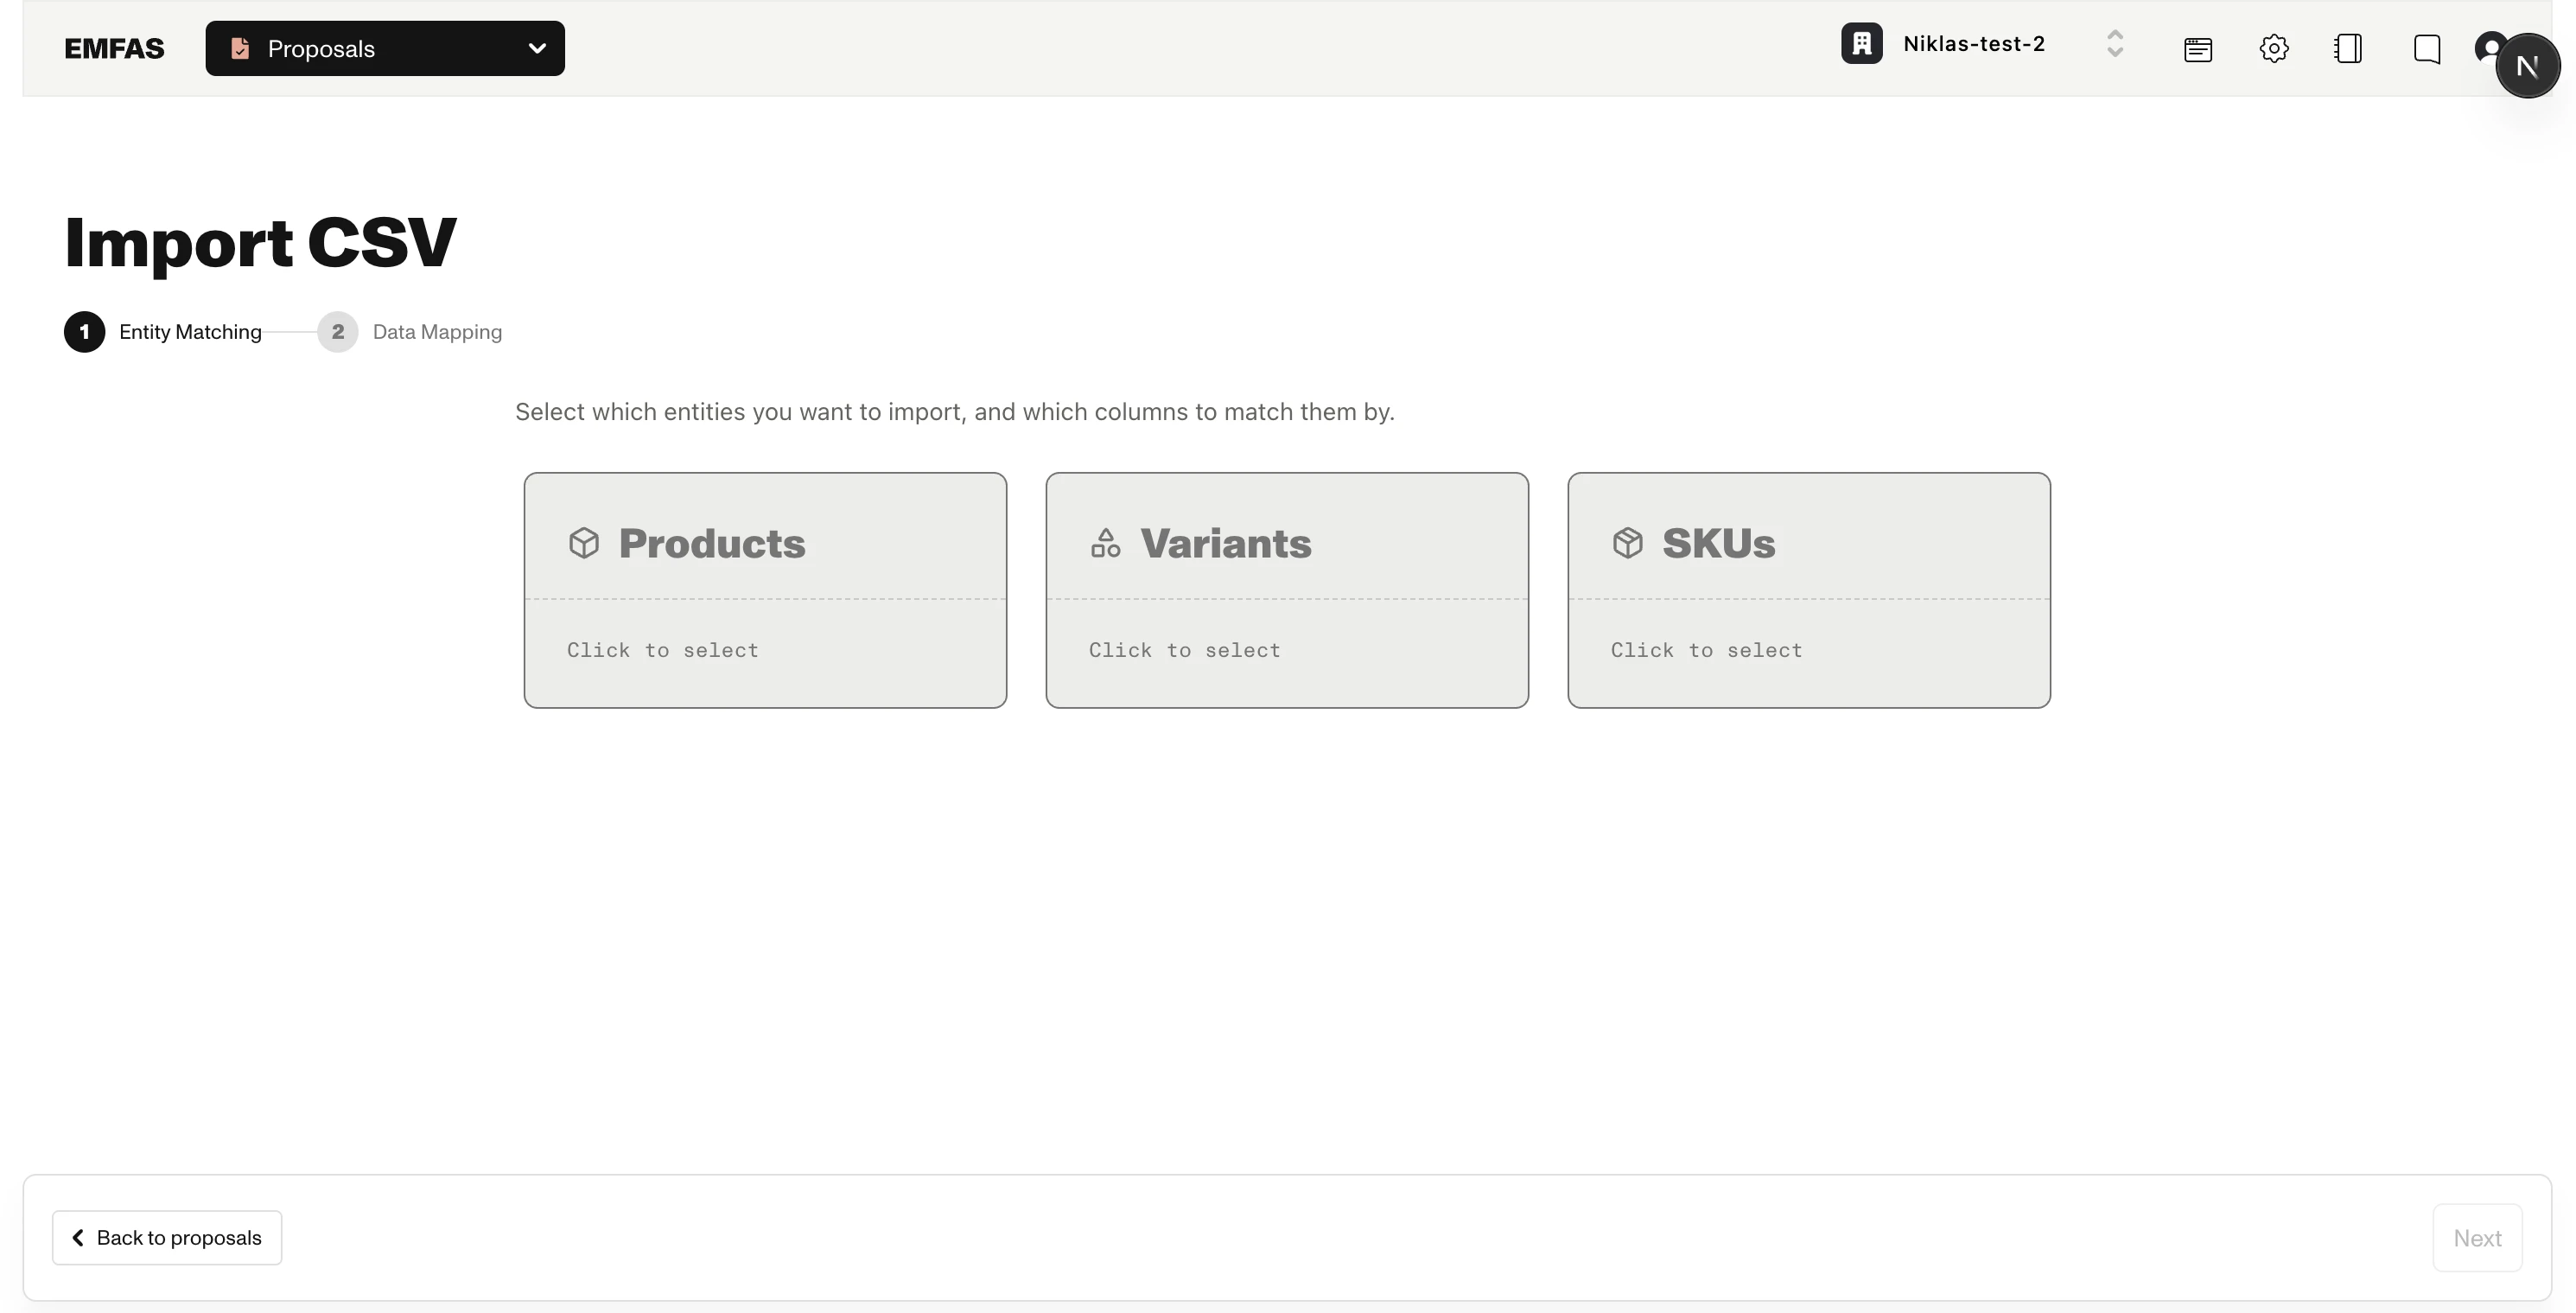
Step 1: Entity Matching
The first step is where you tell Emfas which entity types are present in your CSV, and which columns in your file match each row to an existing entity.
You'll see cards for Products, Variants, and SKUs — plus Metaobjects and Categories for importing those instead (metaobject and category imports are scoped to one definition or tree and can't be mixed with product data; see Importing categories with CSV). Click a card to select it, then choose what to match on and which CSV column holds those values.
How does matching work?
Not sure how rows get matched to your catalog? Click the How does matching work? link in the intro row (or the help icon next to the Match by label on any card) for an in-app explainer covering matching by ID vs. by attribute.
Choosing what to match by
Each selected card has a Match by selector that controls how Emfas links your CSV rows to existing entities:
| Match by | What it matches on | When to use it |
|---|---|---|
| <Entity> ID (default) | The entity's ID in Emfas — the same ID shown under the entity's name in your catalog | Your CSV already uses Emfas (or your connected platform's) entity IDs |
| An attribute | The value of an attribute you pick, such as an SKU code or EAN | Your CSV identifies rows by a business identifier rather than the Emfas ID |
Any single-value text, number, select, URL, color, boolean, or date attribute on that entity type can be used for Match by attribute. Attribute matching is case-insensitive, so ABC-123 and abc-123 match the same entity.
Matching by attribute only updates existing entities
When you match by an attribute, Emfas can only update entities it finds — there's no option to create missing ones. If you need to create entities for unmatched rows, match by ID instead (see Creating missing entities).
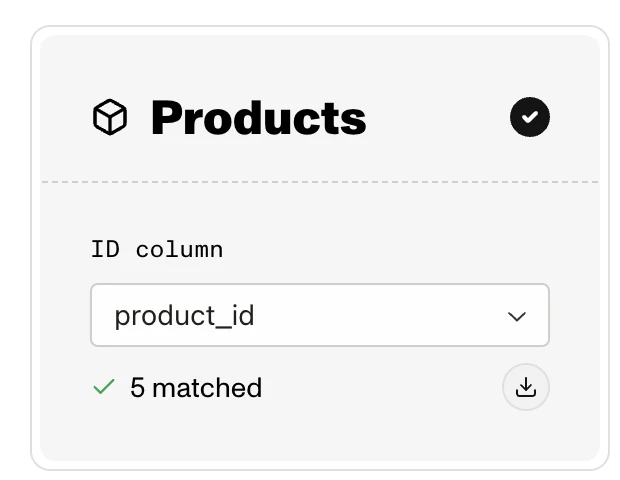
Selecting an ID column
After choosing what to match by, pick the CSV column that holds those values in the ID column selector:
| Entity | What to map | Example column |
|---|---|---|
| Products | The CSV column containing your product identifier (or chosen attribute value) | product_id, handle, product_number |
| Variants | The CSV column containing your variant identifier (or chosen attribute value) | variant_id, sku-001 |
| SKUs | The CSV column containing your SKU identifier (or chosen attribute value) | sku_id, barcode |
The same column can't be used for two different entity types — once you map a column to Products, it's disabled in the Variants and SKUs dropdowns.
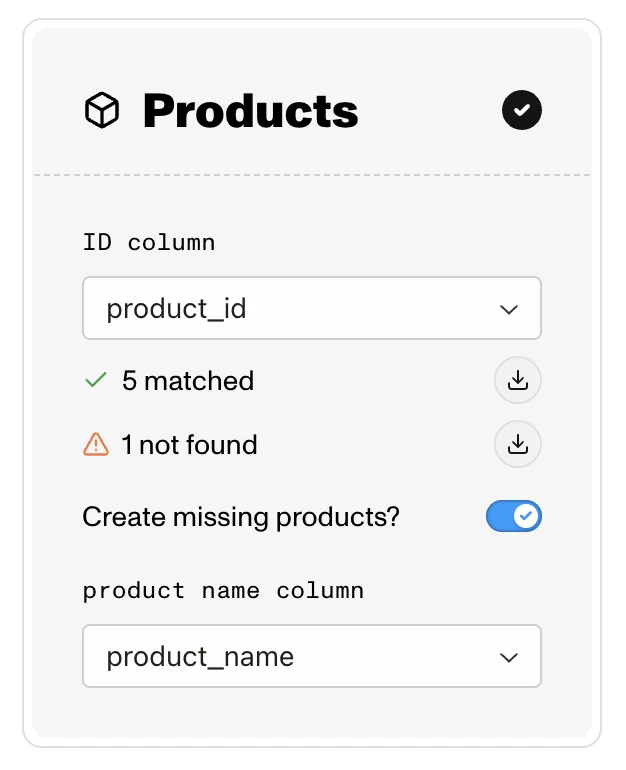
Live match preview
As soon as you map an ID column, Emfas looks up those IDs against your existing data and shows you:
- X matched — IDs found in Emfas (these will be updated). You can download the list of matched IDs as a CSV.
- X not found — IDs that don't exist in Emfas yet. You can download the list of missing IDs too.
This preview runs per entity, so each card loads independently. If the lookup fails, you'll see a Retry button on the card.
Confirm your ID format here
The match preview is your earliest signal that your ID format is correct. If you mapped a Product ID column and see "0 matched, 500 not found", your IDs are almost certainly in the wrong format — go back and check before continuing.
Creating missing entities
When you match by ID and the preview shows IDs that aren't found in Emfas, a "Create missing X?" toggle appears on that card. (This toggle is not available when matching by an attribute — attribute matching only updates existing entities.)
- Off: rows with unknown IDs are skipped.
- On: Emfas will create new entities for those unknown IDs. You'll be asked to pick a Name column (e.g. product name column) so the new entities have a name.
Your choice on this toggle is remembered across preview refreshes — once you turn it off it stays off.
Child entities need a parent
- To create Variants, you must also map a Product ID column.
- To create SKUs, you must also map a Variant ID column.
The card will show a hint if a required parent column is missing.
When can I continue?
The Next button enables once:
- At least one entity type is selected
- Every selected entity type has an ID column mapped
- The match preview has finished for each selected entity
- At least one row can be resolved (either a match or a row that will be created)
- If you enabled creation, the required name column is mapped
Step 2: Data Mapping
This is where you connect the remaining CSV columns (everything that isn't an entity ID or name from step 1) to fields in Emfas.
The screen is organized into three columns:
| Section | What it shows |
|---|---|
| Left column | The CSV column header |
| Middle column | The Emfas field this column maps to |
| Right column | An example value from the current row of your CSV |
You can browse through different rows by clicking the arrow keys next to the Example data header — useful for sanity-checking your mappings against real values.
The mapping toolbar
The toolbar above the mapping table holds the Load Template, Save, Auto-map columns, and Advanced buttons.

Auto-mapping
Click Auto-map columns to let Emfas guess mappings for any unmapped columns based on column names and sample values. Columns you've already configured (including the entity ID/name columns from step 1) are left alone.
Templates
If you import similar CSVs often, you can save your mapping setup as a reusable template:
- Load Template — apply a saved template to your current import. Mappings that don't apply to the entity types you selected in step 1 are skipped (you'll get a toast telling you which ones).
- Save → Update "template" — update the currently loaded template with your latest changes.
- Save → Save as new template… — save your current setup as a new template.
Advanced settings
The Advanced button (with the gear icon) opens a popover with two settings:
| Setting | What it does |
|---|---|
| Blank Cells — Keep existing (default) | Blank cells are ignored. Existing values stay untouched. |
| Blank Cells — Clear field values | Blank cells clear the corresponding field in Emfas. |
| Column Headers — Import values only (default) | Only the cell value is imported. |
| Column Headers — Include column name as prefix | The column header is prepended to the value (e.g. "size: large"). Useful when dumping multiple columns into a single free-text "data dump" attribute. |
A small dot on the Advanced button indicates one of these settings is non-default.
Clearing values
The Clear field values option means blank cells in your CSV will remove the existing data. This is a destructive operation — but because this is a proposal flow, you'll still get to review and reject those clears before publishing.
Choosing fields to map to
Click on a field selector in step 2 to pick an Emfas field for that column.
Combining multiple columns
You can map multiple CSV columns to the same Emfas field. When you do this, the contents from all mapped columns are combined into that field.
A common workflow is to create your own "data dump" attribute and map several columns of raw or unstructured data (specs, notes, descriptions from different sources) into it, then use it as the source for AI-generated content in your customer-facing fields like Description, Title, or Meta Description. See Using a "data dump" attribute for the full pattern.
Available fields are filtered to match the entity types you selected in step 1 — for example, variant attributes only appear if you selected Variants in step 1.
Category, Metaobject, and Reference fields
Some Emfas fields link products to other entities — categories in a category tree, metaobjects, or other products and variants. For these, the CSV cell should contain the external ID of the entity to link to:
| Field type | What to put in the CSV | Example |
|---|---|---|
| Category | The external ID of the category | clothing-tops |
| Metaobject | The external ID of the metaobject | material-cotton |
| Product reference | The external product ID | summer-dress-2024 |
| Variant reference | The external variant ID | 12345-001 |
Emfas resolves these external IDs to the correct internal records during import. If an ID can't be resolved, that field value is skipped for that row.
Multi-value reference fields
If a reference field can hold multiple values, separate external IDs with commas. For example: clothing-tops,clothing-dresses to assign a product to two categories at once.
Numeric field operations
When you map a column to a numeric field (like Price, Number, or Weight), an Operation dropdown appears next to the field selector. This lets you choose how the CSV value should be applied:
| Operation | What it does | Example |
|---|---|---|
| Set (replace) | Replaces the existing value with the CSV value | Set price to exactly 99.00 |
| Increase by | Adds the CSV value to the existing value | Add 5.00 to current price |
| Decrease by | Subtracts the CSV value from the existing value | Subtract 10.00 from current price |
| Increase by % | Increases the existing value by the CSV percentage | Increase price by 15% |
| Decrease by % | Decreases the existing value by the CSV percentage | Decrease price by 20% |
Bulk price adjustments
Useful for percentage-based price changes across your catalog. For example, upload a CSV with a column containing 10 and map it to Price with Increase by % to raise the prices of all listed products by 10%.
Selecting language for localized fields
Some Emfas fields support multiple languages — these are called localized fields. When you map a CSV column to a localized field, a language picker appears so you can select which language the data is in.
Importing multiple languages at once
You can import multiple languages in a single CSV import as long as each language is in its own column. Map each column to the same field (e.g. Description) and pick the correct language for each mapping.
Importing images via URL
When mapping a CSV column to a Media field (image attribute), you can provide external image URLs instead of uploading files. Emfas will create assets from these URLs and link them to your products.
| Format | Example |
|---|---|
| Single image | https://cdn.example.com/product-front.jpg |
| Multiple images | https://cdn.example.com/front.jpg,https://cdn.example.com/back.jpg |
Supported formats include JPG, PNG, GIF, WebP, SVG, and MP4 video.
Using a "data dump" attribute for unstructured data
A common pattern with CSV imports is to create your own free-text attribute — something like Data Dump, Raw Source Data, or Supplier Notes — and pipe everything unstructured into it. You can create the attribute up front in Settings, or inline from the field selector the first time you map a column to it.
The typical workflow:
- During import: map multiple CSV columns with raw data — supplier descriptions, specifications, notes, anything unstructured — to your data-dump attribute. The contents of all mapped columns are combined into the same field. Enabling Column Headers — Include column name as prefix in the Advanced settings is helpful here, so the field ends up with values like
"material: cotton"and"care: machine wash"rather than a blob of unlabelled strings. - After import: use this combined source material to generate AI content for your customer-facing fields like Description, Title, and Meta Description.
This keeps your data organized: raw, ingested data lives in one place, and your polished customer-facing fields stay clean.
Creating the proposal
When you click Create proposal, Emfas builds a proposal containing all the field changes implied by your mapping and opens it for review.
Inside the proposal you can:
- See every suggested change row-by-row
- Accept or reject individual suggestions
- Edit values inline
- Publish the proposal when you're happy with it — only then are the changes written to your catalog
Nothing happens to your catalog until you publish
Creating the proposal is safe — it doesn't modify your live data. You always get a chance to review the suggested changes before they go live. If something looks off, you can discard the whole proposal without any cleanup.
Publishing also syncs to connected platforms
For fields connected to an external ecommerce platform (Shopify, Centra, etc.), publishing the proposal automatically pushes the new values out to that platform too. There's no separate sync step — once the proposal is published, the connected store sees the change.
Multi-entity rows
A single CSV row can produce suggestions for more than one entity type at once. For example, if your row has both a product_id column and a variant_id column mapped in step 1, and you mapped:
- a column to a Product attribute (e.g. Brand)
- a column to a Variant attribute (e.g. Color)
…then that row will create one suggestion on the matched product and one suggestion on the matched variant. You no longer need separate imports per entity level.
Common mistakes to avoid
Using the wrong ID format
By far the most common issue is mapping a column whose values don't match the identifier format your connected platform uses — see ID formats for connected platforms for the exact format per platform.
How to catch this: look at the match preview in step 1 immediately after mapping an ID column. If you expected to update 500 products but see "0 matched, 500 not found", your ID format is wrong — fix it before continuing.
Forgetting the parent ID when creating children
If you turn on Create missing variants but don't map a Product ID column, the wizard will block you with an inline hint. Variants need a product, and SKUs need a variant — there's no way around it.
Best practices
Prepare your CSV file
- Keep the file under 300MB
- Use clear, descriptive column headers
- Make sure ID columns are in the right format for your setup
- Remove any test or dummy rows
Start small
If this is your first import for a given format, try a small test file with just a handful of rows. You'll catch mapping mistakes faster, and the resulting proposal will be quick to review.
Use the match preview as a sanity check
Step 1 is the cheapest place to catch problems. If the matched counts don't look right, fix the issue there — don't proceed and hope for the best in the proposal.
After publishing the proposal
Once you publish the proposal, your data is available in the product catalog. You can:
- Use filters to find the newly imported or updated products
- Edit individual products to refine the data
- Create more proposals to generate AI content for the imported products
- Make bulk changes to update multiple imported products at once
A note for brand-new workspaces
If your workspace has no attributes defined yet — in practice, only the very first CSV import on a brand-new workspace — the wizard inserts an extra Create Attributes step between Entity Matching and Data Mapping.
You'll see a table where each row is a non-identifier column from your CSV. For each one you choose the Name, Type (Text, Number, Boolean, Select, etc.), Target entity (Product, Variant, or SKU), and whether it's multi-select. Clicking Create attributes & continue bulk-creates them and auto-maps them to their CSV columns in the Data Mapping step.
Once your workspace has any attributes, this step is gone for good — every later import goes straight from Entity Matching to Data Mapping.